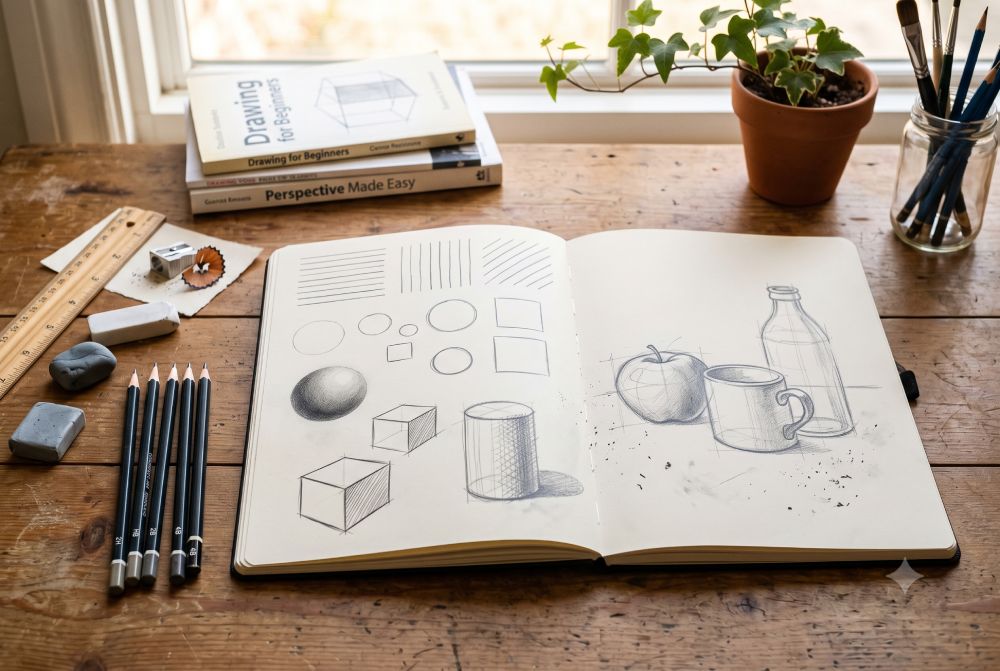
Drawing is one of the easiest ways to start exploring art.
You don't need expensive materials, a special studio, or years of experience. A pencil, some paper, and a little time are enough to begin. The difficult part for many beginners is knowing what to practice first.
Should you start with portraits? Landscapes? Objects? Shading?
The best approach is to start with simple things and slowly build your skills.
In this guide, we'll go through some basic drawing exercises and ideas that can help you get started.
If you're completely new to art, you can also read our Introduction to Art: A Guide for Beginners before starting.
Do you need natural drawing talent?
You may have heard someone say, "I'm not good at drawing."
Many people stop themselves from learning because they believe drawing is something you're either born with or you're not.
But drawing is a skill that can be learned. Some people may have more experience or a natural interest in drawing, but practice makes a huge difference.
When you practice regularly, you start getting better at:
- Controlling your pencil
- Observing shapes
- Understanding proportions
- Seeing light and shadow
- Drawing what you actually see
- Adding details
So don't worry about making your first drawings perfect.
Your first goal is not to create a masterpiece. Your first goal is to practice.
1. Start with simple shapes
Almost everything around you can be broken down into simple shapes.
Look at a coffee mug. It has circles and curved lines.
Look at a book. It is mostly rectangles.
Look at a tree. Its trunk can be simplified into basic shapes, while the leaves can be represented with simple clusters.
Start practicing these basic shapes:
- Circles
- Ovals
- Squares
- Rectangles
- Triangles
- Cylinders
- Cubes
- Spheres
Don't just draw one shape and move on. Draw the same shape several times. Try making circles of different sizes. Draw squares from different angles. Practice cylinders with different heights.
This helps your hand become more comfortable with the pencil.
Beginner exercise
Fill one page of your sketchbook with circles. They don't need to be perfect.
Try to make each circle with one smooth movement instead of slowly drawing around the same line again and again.
2. Practice basic lines
Lines may look simple, but learning to control them is an important part of drawing. Practice different types of lines:
- Horizontal lines
- Vertical lines
- Diagonal lines
- Curved lines
- Wavy lines
- Short lines
- Long lines
Try drawing them slowly at first. Then gradually increase your speed. You can also practice drawing two points and connecting them with one line. This simple exercise can improve your pencil control.
Beginner exercise
Draw several pairs of dots across your paper. Now try connecting each pair with a single straight line. Don't worry if some lines are uneven. Keep practicing. Over time, your hand will become more controlled.
3. Understand proportion
Proportion means the size of one part compared with another part. It is one of the most important things to understand when learning to draw. For example, if you're drawing a bottle, you need to observe:
- How tall is it?
- How wide is it?
- How wide is the neck compared with the body?
- Where does the widest part begin?
- How large is the opening?
If these relationships are incorrect, the drawing may look unusual even if you've added lots of detail.
Beginner tip
Before adding details, look at the overall size and shape of your subject. You can lightly mark the height and width of the object first. Then build your drawing inside those boundaries.
Get the shape right first. Add details later.
4. Learn light and shadow
Once you're comfortable with basic shapes, start learning about light and shadow. Shading helps turn a flat shape into something that looks three-dimensional. For example, a simple circle can look flat.
But when you add light and dark areas correctly, it can start looking like a sphere. Pay attention to:
- Where the light is coming from
- The brightest area
- The darkest area
- The shadow on the object
- The cast shadow on the surface
You don't need to make complicated drawings at this stage. Start with simple objects such as a ball, cube, cylinder, or apple.
Beginner exercise
Draw a circle and turn it into a sphere using only your pencil. Choose one direction for your light source and keep the opposite side darker. Try using different pencils, such as HB, 2B, and 4B, to create different levels of darkness.
5. Practice with everyday objects
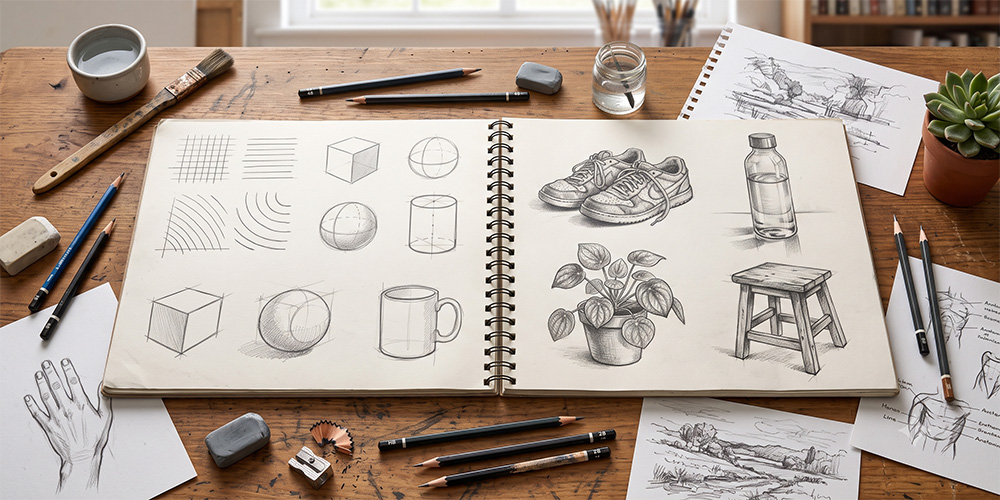
You don't need to find complicated subjects to practice drawing. Look around your home. You already have plenty of things to draw. Try objects such as:
- Cup
- Bottle
- Spoon
- Book
- Apple
- Plant
- Shoes
- Keys
- Camera
- Small box
Choose one object and spend 10–15 minutes observing it before trying to draw it. Look at its shape, proportions, edges, shadows, and details.
Beginner tip
Don't constantly look at your paper while drawing. Look at the actual object often. Drawing is not only about moving your pencil. It is also about learning to observe.
6. Start with simple still-life drawings
Once you're comfortable drawing individual objects, put two or three objects together. This is called a still life. For example, you could place:
- A cup
- An apple
- A small bottle
On a table and draw them together. Now you'll have to think about more than just the individual objects. You'll also need to look at:
- The position of each object
- Their relative sizes
- Overlapping shapes
- Shadows
- The space between objects
- The overall composition
This is a great way to practice several drawing skills at the same time.
Beginner exercise
Place three simple objects on a table. Use a single light source, such as a window or lamp. Make a quick sketch first.
Don't worry about small details. Concentrate on getting the shapes, proportions, and positions correct.
A simple drawing practice routine
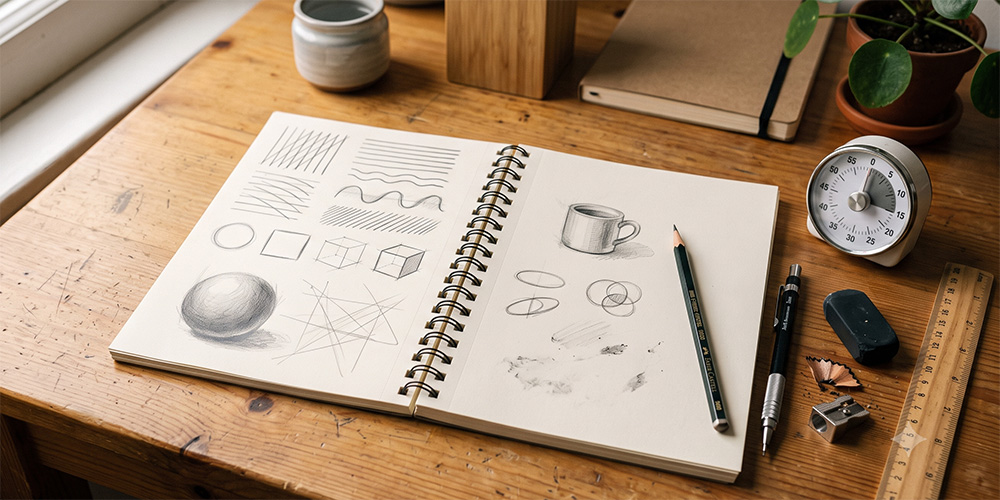
You don't need to spend hours drawing every day. Even 15–20 minutes of regular practice can help you improve. Try this simple routine:
| Practice | Time |
|---|---|
| Lines | 3 minutes |
| Basic shapes | 3 minutes |
| Shading | 4 minutes |
| One everyday object | 5 minutes |
| Free drawing | 5 minutes |
You can change the exercises as you improve. The important thing is to keep practicing.
Don't worry about perfect drawings
Your early drawings may not look the way you imagined.
That's completely normal.
You may draw a circle that looks uneven. A bottle may have the wrong proportions. Your shading may look too dark or too light.
Keep going.
Instead of asking "Is this drawing good?", ask yourself:
"What can I improve in my next drawing?"
That small change in thinking can make practice much more enjoyable.
7. Learn basic perspective
Perspective helps you show depth and distance in a drawing.
For example, imagine you're standing on a straight road. The sides of the road appear to move closer together as they go farther away.
This is the basic idea behind perspective. As a beginner, start with one-point perspective. You can practice drawing:
- Roads
- Hallways
- Rooms
- Buildings
- Tables
- Boxes
Start with a simple horizon line and a vanishing point. Then use light guide lines to build your objects.
Don't worry if it feels confusing at first. Perspective becomes easier with practice.
Beginner exercise
Draw a horizontal line across your paper. Place one point somewhere on the line.
Now draw several lines from different parts of your page toward that point. Use these lines to create a simple road or room.
8. Practice drawing from reference photos
Drawing from a reference photo is a great way to practice. A reference gives you something specific to observe instead of trying to invent everything from your imagination. You can use photos of:
- People
- Animals
- Plants
- Buildings
- Landscapes
- Everyday objects
When choosing a reference, start with a simple image that has clear shapes and good lighting. Don't worry about copying every tiny detail. Instead, look at the large shapes first.
Beginner tip
Before you start drawing, spend a few moments looking carefully at the reference. Ask yourself:
- What is the biggest shape?
- Where is the light coming from?
- What areas are darkest?
- What objects overlap?
- What is the overall proportion?
This short observation step can make drawing much easier.
9. Improve your observation skills
Good drawing is not only about having a steady hand. It is also about seeing carefully. When you look at an object, your brain may tell you what you think the object looks like instead of what it actually looks like.
For example, you know that a cup is usually round at the top. But when you look at a cup from above or below, that opening may appear as an oval. Learning to notice these differences is an important drawing skill.
Try this exercise
Place a simple object in front of you. Instead of drawing it immediately, spend two minutes just looking at it. Notice:
- Its overall shape
- Its edges
- Its proportions
- The direction of the lines
- Light areas
- Dark areas
- Negative spaces around it
Then start drawing. With regular practice, you'll begin noticing details that you previously missed.
10. Use light and shadow more effectively
Once you understand basic shading, try using it in complete drawings. The important thing is to first decide where your light is coming from. For example, if the light is coming from the upper left:
- The upper-left side of the object may be lighter.
- The opposite side may be darker.
- The object may cast a shadow toward the opposite direction.
Try not to shade randomly. Think about the light source throughout the drawing.
Beginner tip
Start with three simple values:
Light → middle tone → dark
Once you're comfortable with these three levels, you can gradually add more subtle shades. This is much easier than trying to create every possible shade at once.
11. Learn to draw what you see, not what you think you see
This is one of the biggest changes that happens when you start improving at drawing. Instead of drawing what you know an object looks like, try to draw what you actually see.
For example, you may know that an apple is round. But the apple in front of you may have:
- A slightly uneven shape
- A small dent
- A darker side
- A visible stem
- A shadow underneath
Those small differences are what make your drawing look more realistic.
Try this
Choose an ordinary object and draw it without naming it in your mind.
Don't think: “I'm drawing a bottle.”
Instead, think: "I'm drawing this curved line, this shadow, this oval, and this edge."
This can help you observe the subject more objectively.
12. Common drawing mistakes beginners make
Everyone makes mistakes while learning to draw. Here are some common ones.
Adding details too early
Beginners often start with eyes, hair, small patterns, or other details before getting the overall shape right.
Try this instead: Start with simple shapes and proportions. Add details near the end.
Pressing the pencil too hard
Heavy lines are difficult to correct and can make the drawing look rough.
Try this instead: Begin with light pencil strokes and gradually make important areas darker.
Drawing without observing
Looking at the paper more than the subject can lead to incorrect proportions.
Try this instead: Keep looking back at your reference or object while drawing.
Trying to finish too quickly
A drawing doesn't have to be completed in one sitting.
Try this instead: Take your time and check your proportions and shadows as you work.
Comparing your first drawings with experienced artists
This can make you feel like you're not improving.
Try this instead: Compare your current drawing with your older drawings. That's a much more useful comparison.
13. A simple 15-minute daily drawing practice
You don't need a lot of free time to practice.
Try this simple 15-minute routine.
3 minutes — Lines and shapes
Draw straight lines, curves, circles, squares, and other simple shapes.
4 minutes — Shading
Draw a small sphere, cube, or cylinder and practice light and dark values.
5 minutes — One object
Choose something nearby and make a quick observational drawing.
3 minutes — Free drawing
Draw anything you want.
Don't worry about making it perfect. This routine can be changed as you improve. The important part is doing it regularly.
How long does it take to learn drawing?
There is no fixed amount of time. Everyone learns at a different pace.
You may notice small improvements after a few weeks of regular practice, while more advanced skills can take months or years to develop.
Instead of asking:
"How quickly can I become good at drawing?"
Try asking:
"What can I learn from today's drawing?"
That mindset makes the learning process much easier. The more you observe and practice, the more naturally drawing skills develop.
Frequently asked questions
Can anyone learn to draw?
Yes. Drawing is a skill that can be developed through practice, observation, and learning basic techniques.
What should I draw as a beginner?
Start with simple objects around you, such as cups, bottles, fruits, books, plants, and shoes. These objects help you practice shapes, proportion, and shading.
Should I learn shading before drawing portraits?
It's useful to understand basic shapes, proportion, and light and shadow before spending a lot of time on portraits. These skills will also help you understand faces better.
How often should I practice drawing?
Try to practice regularly. Even 15–20 minutes a day can be useful. If you have more time, you can practice longer.
Is copying drawings good for beginners?
Studying and copying drawings can help you understand shapes, lines, and techniques. However, also spend time drawing from real objects and references so you develop your observation skills.
Do I need a drawing tablet to learn?
No. You can learn the fundamentals with traditional tools such as a pencil and paper. Once you understand the basics, you can explore digital drawing if you're interested in it.
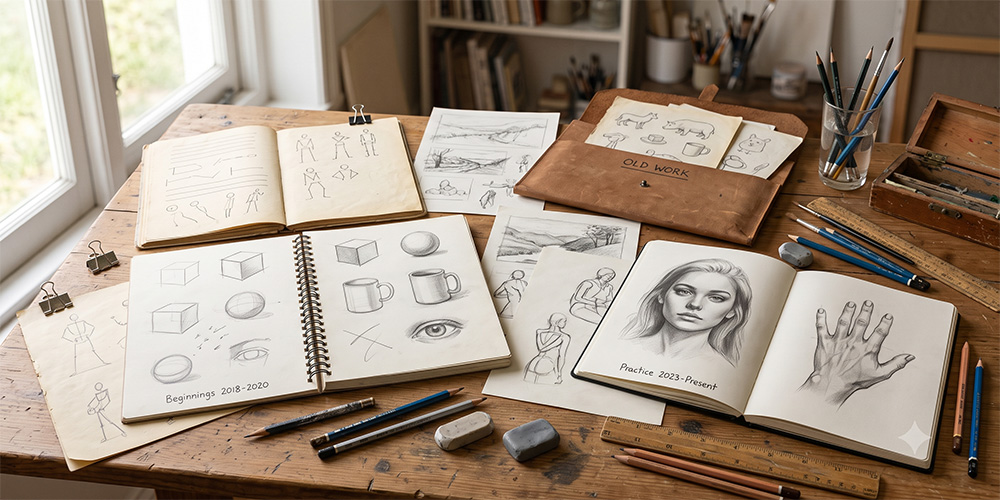
Keep your old drawings
Don't throw away your early sketches. Keep them in a folder or sketchbook.
After a few months, look back at them. You may notice improvements in your:
- Lines
- Shapes
- Proportions
- Shading
- Observation
- Overall confidence
Seeing your own progress can be much more motivating than simply looking for perfection.
Conclusion
Learning to draw doesn't have to be complicated.
Start with lines and simple shapes. Learn to observe proportions and light. Practice with everyday objects and slowly move toward more detailed subjects.
You don't need to create perfect drawings from the beginning.
Draw regularly, observe carefully, and learn from every drawing.
With time and practice, you'll become more comfortable with your pencil and start seeing the world differently.
And that is one of the most enjoyable parts of learning to draw.
Continue learning about art
If you're following this beginner art series, you can continue with: